
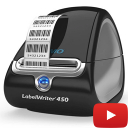
Print Labels with Barcodes. Create price tags, product labels, order labels for WooCommerce
Generate & print barcode labels for WooCommerce products and orders. Put various data on labels like price, SKU, name, attributes, customer data, etc
4.5
(73 ratings)Will this break my store?
What the WordPress.org registry says about keeping Print Labels with Barcodes. Create price tags, product labels, order labels for WooCommerce running.
Tested to 7.0.4 — 1 branch behind 7.1
Tested against the WordPress branch in use today.25 days ago
At least 0.3 releases a year since launch. WordPress.org only lists versions still available for download, so the real number may be higher.7.0
Your host must be running at least this version.6.0
1
A single maintainer. Worth knowing if the plugin is load-bearing for your store.Maintenance & trust
Scored on how Print Labels with Barcodes. Create price tags, product labels, order labels for WooCommerce is looked after — not on how many stores run it.
96
out of 100Maintenance
35 / 35WordPress compatibility
20 / 20Support responsiveness
Not enough dataMerchant satisfaction
12 / 15Listing transparency
10 / 10Ratings
4.5
73 ratingsGenerate & print barcode labels for WooCommerce products and orders. Put various data on labels like price, SKU, name, attributes, customer data, etc
Core features
✔ Generate and print barcode labels for products & orders
✔ Printers support: A4, Letter, P4 & label/thermal printers
✔ Labels can contain: barcode, name, SKU, price, attributes, etc
When your store is growing it could be pretty difficult to manage inventory and orders effectively. Try to improve your workflow by printing barcode labels for your products.
Printed labels can contain various product information which helps to understand the basic details about the product.
And the barcode (on the label) allows to get all the product information from WooCommerce using your POS system.
In combination with our Barcode Scanner plugin, you can scan the barcode and get all the basic product details to manage inventory as fast as possible. And the mobile app allows to scan the barcode and manage your inventory right from the smartphone.
All Features
- Barcode can be generated from Product ID, SKU, GTIN or any other custom field.
- Labels can text like SKU, price, name, attributes, custom field or any other field.
- Print barcode labels for your existing products, purchased items or create & print labels from a bulk list.
- WooCommerce if fully supported along with product variations, attributes, custom fields, etc.
- Printers supported: A4, Letter, P4; Roll/Thermal label printers like DYMO, Zebra, Brother and other models.
- Barcode labels can be read by hand-gun scanners or iPhone/Android smartphones
- Adaptive font size allows to fit texts on each label in the most optimal way.
- Adjustment label template via settings is possible.
- Supported barcode types: CODE128, CODE39, QRCode, DataMatrix, GTIN, GS1 family (UPC-A, UPC-E, EAN-13, EAN-8)
Possible use cases
Scanning the barcodes
The barcodes on the labels can be scanned by various software and devices. You may already have some barcode scanning plugin (or POS system) which will allow you to scan and manage the products/orders.
However, if you don’t have such plugin yet, we recomend you to use our lite Barcode Scanner plugin for fast and effective inventory/order managment.
With this plugin you simply scan the barcode and associated product or order will be shown to you in a few seconds. And the iOS/Android app will allow you to do so from the smartphone.
Printing barcode labels for existing products
Plugin allows to create labels for existing products.
You can print labels (with or without the barcode) in 4 different ways:
* “All Products” page – you can check/select a few products and then press “Product Label” button at the top of the product list.
* “All products” page – create label for 1 specific product by clicking on “Label” icon near each product in the product list.
* “Product edit” page – you will find button “Product Label” above product description for the current product.
* “Product edit” page – you will find buttons “Product Label” for each variation in the “Variations” section.
Printing barcode labels for purchased items
Use this plugin to create labels for purchased items in the order.
There 3 ways to create such labels:
* “Orders” page – check/select one or a few orders and press “Product Label” button at the top of he order list.
* “Inner Order” page – Open one specific order and press “Product Label” button on the right hand side (in a widgets section).
* “Inner Order” page – Each purchased item has a “Select” checkbox which you can mark and then press “Create Product Labels” button below the purchased items.
Consider to upgrade to full version:
** Basic version: **
1. You will get 2 more label templates with possibility to add up to 8 product fields/text to the barcode label.
First template optimized for the barcodes (CODE128, CODE39, UPC-A, UPC-E, EAN-13, EAN-8) and the second one is optimized for the 2D barcodes (QRCode, DataMatrix).
So, depending on your case you are getting label template which will fit barcode and texts in the most optimized way possible.
2. Help of configuring the printer settings in your OS (via AnyDesk or TeamViewer)
** Business version:**
Includes basic features plus:
- You are getting a few more business templates with even more possibilities like adding product image or logo to label.
We are constantly adding new business label templates, so you have quite a room in selecting the design/layout of the template. - You are getting template editor which will allow you to create new or adjust existing templates in a way you need (knowledge of HTML/CSS is required)
** Premium version:**
Includes business features plus:
- You can order development of custom label template design from our team – it will be developed to fit your specific needs.
- Includes implementings some features in the plugin by your request.
How to:
Barcode labels Manually:
- Click at “Barcode Printer” -> “Open Preview” menu – popup will appear.
- Fill in “Barcode” field with product SKU or any other code as this field is used for barcode generating.
- You could also fill optional fields “Line1” – “Line4” for adding any additional information.
- Select “Type” of barcode – read more about barcode types here.
- Click “Add to Page” button and new label will appear at the preview.
- You can add any amount of barcodes/pages before printing them.
- Press “print labels” button
Import Products:
- Go to WooCommerce “Product List” page.
- Select/check products which you would like to import.
- Click on “Generate Barcodes” button and popup will open with similar settings like when you created barcodes manually.
- Match fields “Barcode”, “Line1” – “Line4” with proper columns and select “Type” of barcode and then click “Generate” button.
- You can repeat above actions many times and then print all added barcodes by clicking “Print” button.
- Press “print labels” button
Import Categories
- Go to WooCommerce Categories page.
- Select categories you would like to import and press “Generate Barcodes” button.
- Match fields “Barcode”, “Line1” – “Line4” with proper columns and select “Type” of barcode and then click “Generate” button.
- Note: It might be a not good idea to try to import thousends of products at the same time.
- Press “print labels” button
Import Orders
- Go to WooCommerce Orders page.
- Select orders you would like to import and one of the buttons: “Import Orders” or “Import Products”.
- “Import Orders” button will create barcode label for a whole order.
- “Import Products” button will create barcode for each product in the order.
- Match fields “Barcode”, “Line1” – “Line4” with proper columns and select “Type” of barcode and then click “Generate”.
- Press “print labels” button
Import forms from “Contact Form 7” & “Flamingo”
- Go to “Flamingo”->”Inbound Messages” page.
- Select forms you would like to import and press “Generate Barcode” button.
- Match fields “Barcode”, “Line1” – “Line4” with proper columns and select “Type” of barcode and then click “Generate”.
- Press “print labels” button
How to Add new label sheet:
- Click in menu “Open Preview”
- Click on “Labels sheet” dropdown and select “+ Add new” at the bottom.
- In popup “New label sheet” enter all required sizes. You can find all these sizes on label sheet box.
- Click “Add Format”.
More information about bar-code plugin find here:
- Barcode Labels Printing
- FAQ
- User Manual
- [Front-end source code] (https://github.com/ukrsolution/Barcode-Label-Printing-Front-end)
By default bar-code generator contains the most popular A4 label sheets that allows to print 12, 14, 16, 21, 24, 40, 44, 56, 65, 120, 189, 230 or 324 barcodes per page.
If you have label sheet with different amount of labels or with different sizes – you can easily create your own custom format – just specify sizes of labels, margins, label gaps and new format will be ready for work.
By default plugin allows to display on barcode 2 attributes/custom fields. For this you need to match “Text1” and “Text2” fields on “Import” popup with specific attribute or custom field. To use 3 or more attributes/custom fields on barcode you will have to create new barcode template and by using shortcodes like [attr=gcolor] or [cf=_regular_price] specify where they should be placed. The value for shortcode might look different, like “tshirt_size”, “upc_code” or “my_custom_field”. Usually name of custom field or attribute is specified in plugin/place where it was created.
Before printing it’s very important to get to know your printer a little bit better, especially we need to know if printer can print without page margins.
The right way to do it is to read technical documentation about your printer (or find it in google) but if you lost documentation or can’t find in google there is another way.
Print this PDF page and compare if it looks the same as on PDF. If page border doesn’t look the same – your printer might not suport border-free printing or you didn’t check this option in print settings popup.
It’s ok, actually most of printers can’t do it. You just need to use label sheets with page margins.
Here is example of label sheet (40 labels per page) with page margins.
Our Bar-code Generator supports most popular types of codes: CODE128, UPC, EAN, EAN8, CODE39, EAN13, QRCode and DataMatrix.
There are 2 ways:
1. You can save each code as PNG image.
2. You can save all pages as PDF document, so you will be able to print them later.
As much as you need 🙂
Our barcode generator contains buil-in set of the most popular A4 label sheets which allows to add 12, 14, 16, 21, 24, 56 or 65 barcodes per page.
And you can create any amount of your own label sheet formats.
Please follow these steps:
1. Click at “Barcode Generator” -> “Import categories” menu.
2. Check categories for which you’d like to create barcodes, specify barcode type and fields you’d like to use for barcode generation.
3. Click “Import” button.
Sure, one barcode can contain and code and product name.
You need to send email to us and provide us with details:
How to reproduce bug
Screenshots of bug
Best way to describe the problem is to create video (you can use software like Jing)
Sure, this option available on the settings page.
Yes, our plugin supports this option which you can find on the “custom template” page (the [code] value tab).
You can report security bugs through the Patchstack Vulnerability Disclosure Program. The Patchstack team help validate, triage and handle any security vulnerabilities. Report a security vulnerability.
Categories
Plugin details
Tags on WordPress.org
Alternatives
Other plugins in the same categories.
Advanced Woo Labels – Product Labels & Badges for WooCommerce
Custom Product Tabs for WooCommerce & WordPress Tabs Builder – Smart Tabs

Easy Auto SKU Generator for WooCommerce

PW WooCommerce Bulk Edit
PVT – Product Variation Table for WooCommerce